GitBuilding Syntax Reference
A GitBuilding project can be as simple as a folder with some Markdown files in it. To add extra information into these files to allow a bill of materials to be generated we use a syntax we call BuildUp. GitBuilding will then process the BuildUp and export the result it in either a plain Markdown format or HTML.
When specifying parts in BuildUp they can have their own BuildUp page, or can be part of a BuildUp part library in YAML format.
It is possible to customise how GitBuilding builds the Buildup into plain markdown or HTML by making a configuration file called buildconf.yaml.
GitBuilding can also be used to generate more complex documentation for multiple similar projects. For more information see our organising complex projects guide.
Table of contents
- BuildUp Syntax
- Page title
- Step links
- Part links
- Output and FromStep links.
- Displaying Bill of Materials
- Page steps
- Info links
- Warning/Caution/Information/Help blocks
- Coloured and icon bullet points
- Page lists
- Variables
- Include statements
- Include text statments
- Embed and preview
- 3D preview pages
- Zipping and zip links
- Page data
- GitBuilding BuildUp
BuildUp Syntax
Page title
BuildUp may use a page’s title in another page. A pages title is the first instance of a H1 (Heading Level 1) markdown title using the # syntax.
Step links
To link to another file and have it included in as a step you append {step} to the link for example
[Print the components](print.md){step}
or in reference style:
[Print the components]{step}
[Print the components]: print.md
If you want to use the title of the page as the link text then you can replace the link text with a ., so
[.](print.md){step}
will also give the same result if the title of print.md is “Print the components”. This is not implemented for reference style links as there is nothing to reference.
Note that {step} is case insensitive, {Step} or {STEP} are also valid.
Part links
To have a part counted in the bill of materials a part link is used. A part link is a link followed by the syntax {Qty: quantity} where quantity can be a number of free text. The following are valid part links:
[screws]{Qty: 4}
[bigger screws](bigscrews.md){qty:Many}
Just as with the step links qty is case insensitive, also the space after the : is optional.
Multiple links to the same item will be counted. Only the first one needs to have the link (URI) specified as the final markdown will create a reference style link for all parts. Linking to the same item using different text can be achieved using [markdown] reference link syntax:
Screw an [M3 nut](m3nut.md){Qty: 1} onto the [M3x25 screw](m3x25screw.md){Qty: 1}. Then add[a second nut][M3 nut]{Qty: 1} to lock it in place.
This will count two M3 Nuts and one M3x25 screw.
Numbers are counted as expected. If text quantities are added the result is Some, and a warning is logged. GitBuilding is somewhat unit aware. It can add 10 g and 45 g to get 55 g, it can also add 1 kg and 200 g to 1.2 kg. The unit system is somewhat limited and could do with expanding. However, if you add unknown units it will work as expected if they are consistent, i.e. 2 splashes and 3 splashes will add correctly to 5 splashes.
The part link (URI) can be a link to anything for example another website, a markdown file, or an STL file. To use link to a file in a part library you should specify it in the form
[Part](library.yaml#key){Qty: 1}
where library.yaml is the library file, and key is the key for that part.
Extra part metadata
You add extra metadata to a part link to, for example, categorise the part. This information can either be added inside {}s for links or a reference-style link can be used. To use a reference style link extra information can be added inside {}s in the alt-text.
The following are equivalent:
Use a [Large screwdriver](screwdriver.md){Qty: 1, Cat: Tool, Note: 'A Pozidriv works best, but you could try a Philips.'}.
and
Use a [Large screwdriver]{Qty: 1}.

[Large screwdriver]: screwdriver.md "{Cat: Tool, Note: 'A Pozidriv works best, but you could try a Philips.'}"
Extra information is specified in key value syntax that is case insensitive, a comma is used before a new key. The following keys are defined:
TotalQty- This sets the total of a part used on a page. It can be use to over-ride the counted value. It can also be used to check all uses are mentioned in the text as GitBuilding will produce a warning if they don’t match.Cat- Short for “category”. This defines the type of part. Standard BuildUp has two categoriesPartandTool. Parts are counted normally, for tools the maximum quantity used in a single link is used for the bill of materials. GitBuilding can define custom categories in its configuration.Note- This sets a note which is displayed with the part in the bill of materials.
Output and FromStep links.
Sometimes a part that is used in one step of the documentation was created in a previous step. This is handled by using output links and from step links.
Creating an output
Output links define a part that has been created by putting output in the part-link information, for a link with no target:
You have now successfully built the [z-actuator]{output, qty:1}. You will need this later.
The output will actually create an anchor point not a link. We have chosen this syntax because there is no standard markdown syntax for an anchor point. If you do not want the text of the output to show you can hide it:
You are now done!

[z-actuator]{output, qty:1, hidden}.
Using an output
To use a part defined in a previous step you must use the same part name as the output, but set the link target to fromstep. For example:
Now attach the [z-actuator](fromstep){Qty:1} that you made earlier.
This will add the part to the bill of materials for this page. The part will not end up in the total bill of materials for the project as it was made by an earlier step.
Displaying Bill of Materials
To display a pages bill of materials in the markdown the use {{BOM}}. {{BOM}} will be replaced in the output with the bill of materials.
For pages with a larger bill of materials it make sense to have it on a separate page. To generate the page, [linktext]{BOM}. generates a bill of materials page and creates a link to it. It will also create a CSV file for the bill of materials, and link to this too.
This bill of materials can be found [here]{BOM}
Page steps
Each buildup page can be divided into steps. To do this make an H2 level heading by starting a line with ## You can then append {pagestep} to the line. This serves two purposes, it gives you a sub-heading ID you can refer to in a link, and it also auto numbers the steps. For example
## Open the tin {pagestep}
Get the tin and open it with a screw driver.

## Apply paint {pagestep}
Apply paint to the wall
would render as
Step 1: Open the tin
Get the tin and open it with a screw driver.
Step 2: Apply paint
Apply paint to the wall
You can then link to this step with page.md#open-the-tin. The id for the heading link is contains only the alphanumeric characters in the heading plus - and _. Spaces are changed to -s and all letters int the id are lower case.
You can also redefine the ID, if you replaced the line above with:
## Open the tin {pagestep: tin}
then you could link to the step with page.md#tin.
Info links
When writing assembly instruction is is best to stick to simple clear instructions. However, it may be important for those who want to further understand a project to have more information. Info links provide a simple way to link extra information on another page.
An info link is a link where the text is just a lower case i:
* Sand down the [wooden block]{qty:1} with [120 grit sand paper]{qty:"1 sheet"}
* Apply [tung oil]{qty:10 ml} with a [rag]{qty:1}  [i](why_tung_oil.md)

Warning/Caution/Information/Help blocks
Modified blockquote syntax can be used to make special blocks for clear warning or information messages.
Warning blocks can be created with:
>!! **Warning**
>!!
>!! This is hot!
and will output as:

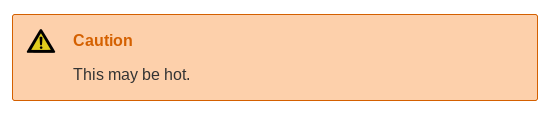
Caution blocks can be created with:
>! **Caution**
>!
>! This may be hot.
and will output as:
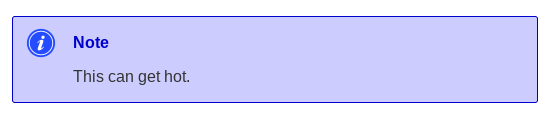
Information blocks can be created with:
>i **Note**
>i
>i This can get hot.
and will output as:
Help blocks can be created with:
>? **What do I do if it is hot?**
>?
>? Wait for it to cool down.
and will output as:

Coloured and icon bullet points
For compatibility with dozuki we have added coloured and icon bullet points. These can be used to match the colour of the bullet points to arrows in your documentation. The following bullet points are available:
*{red} You
*{green} can
*{blue} make
*{yellow} colourful
*{violet} or
*{orange} icon
*{warning} bullet
*{info} points
*{reminder} now!
Providing the following output:

Page lists
Added in GitBuilding v0.12
Sometimes it is useful within documentation to display a list of other pages. For example, a knowledge base page might want to list any pages that provide extra information. If all of these pages are tagged with the tag info (See Tagging a page), then the following syntax will create a list of links to each page:
{{listpages, tag:info}}
Variables
When using step links, you can also assign a variable. Variables always begin with var_. For example you might link to a page as:
[Print the components](print.md){step, var_type: large}
Within the page print.md you can use the variable anywhere in the text including in a link by writing the variables name in double braces.
Download the [stage model](stage_{{var_type}}.stl)
This would allow a complex project to define have two paths through the documentation. One where var_type is set to large and another where it is set to small. All other content on the page would be identical except one would link to stage_large.stl and the other to stage_small.stl
Note: variables should not be used to modify the paths of step links as GitBuilding analyses all step links before assigning variables.
The targetformat variable
In addition to variable that are specified as above. GitBuilding automatically sets the variable targetformat depending on what output is being generated. Possible values are md, html, and pdf. This variable is for use in include statments and and include text statments, ad described below.
Include statements
For complex projects two similar versions of a page are often needed. Variable replacement shown above can be used for very simple changes within a page. If a whole section needs to be optionally included you can include the content of a markdown page directly into another page using an include statement:
{{include: other_file.md}}
Whether this file is included can be set with an if condition:
{{include: fantastic_other_file.md, if: var_type is not boring}}
{{include: boring_other_file.md, if: var_type is boring}}
If conditions always follow the pattern var_name is value or var_name is not value, multiple conditions can be strung together with and or or:
{{include: fantastic_other_file.md, if: var_type is pretty or var_type is awesome}}
Note: The statement var_type is pretty or awesome would not be valid.
Include text statments
Similar to the include statment above, text include statments can be used to vary the output of a page based on variables. It is desinged for cases where creating a whole extra page to embed would be overkill. Instead single words or sentences can be added. For example, see the following example:
{{includetext: "", if: targetformat is html}}
This example can be used to embed a 3D preview of an STL file only if the output is an HTML document.
Embed and preview
GitBuilding can embed previews of 3D models, PDFs and YouTube videos. Preview uses the same syntax as images for example:

{color: deeppink}

Supported files/links are:
- Youtube video link in the full link format (as above)
- STL files
- WRL files
- GLB/glTF files (Will attempt to turn an animation into a exploded view slider)
- PDF files
All files can be dragged and dropped into the editor (links cannot):

3D preview pages
The above supported 3D models can be previewed on their own page. Any STL linked to as a part link will link to the preview page automatically (WRL and GLB/glTF do not).
You can also force a link to create (and link to) a preview page with the following syntax:
Now print [Thingy.stl](models/thingy.stl){previewpage}
Note that {previewpage} can only be used on a link with no other meta data, not as part of a part link or other type of link.
Zipping and zip links
A page may link to a number of files that each need to be downloaded. For example a page about 3D printing may link to numerous STL files, each that need printing. To create a link to all STL files on a page you can use the following syntax:
[Download all the STLs as a zip](high-res-stls.zip){zip, pattern:"*.stl"}
The zip link will match all links in the current page using the specified pattern. Matching patterns follow glob syntax.
Page data
It is possible to specify data about the content of to a page, using a YAML header. The YAML header must be the first thing in the build up file. It consists of YAML data between lines that contain ---.
Information in this header is specified with keys each with has a value. The data can be nested by indenting.
---
Key1: Value1
Key2:
    NestedKey: NestedValue
    NestedKey2: AnotherNestedValue
---
Tagging a page
Added in GitBuilding v0.12
You can give a page a tag.
---
Tags: info
---
By adding tags like this to all info pages another page can then create a page list on another page using the syntax:
{{listpages, tag:info}}
This would create a list of links to all pages tagged with the info tag.
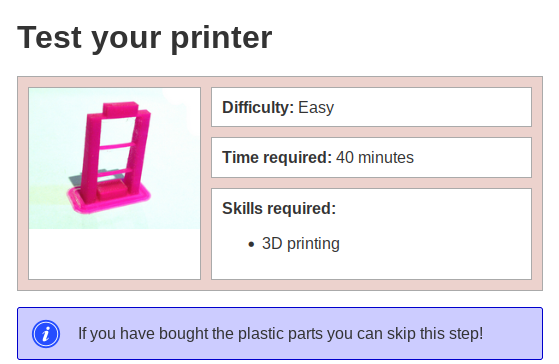
Adding a details header
You can add a header to the start of tour instructions giving a thumbnail for the page and some key information.
To define the details header use the YAML key Details. Sub keys that are pre defined are:
Thumbnail- This should be a link to an imageTime- The time required. This can be any text. It is not yet processed.Difficulty- The difficulty of the instructions on the page. This can be any text. It is not yet processed.Skills- A list of the skills required.
You do not need to use every key. Only used keys will be displayed. You can add custom keys, and their data will also be displayed. The content of custom keys must be text.
An example detail header
---

Details:
    Thumbnail: images/just_leg_test.jpg
    Time: 40 minutes
    Difficulty: Easy
    Skills:
      - 3D printing
---


# Test your printer

>i If you have bought the plastic parts you can skip this step!
This would render as:
Page part data
Any page in BuildUp can be linked to as a part, this allows a longer, more complex explanation of a part than you would want to write into a library file. However, you may wish to provide the same information such as supplier information or specifications. This allows this information to propagate through to the Bill of Materials, and to be rendered the same as it would be for a page created from a part library. This part data can be sepcified in the YAML header of your build up page.
To define this part data use the YAML key PartData, the value of this key should use the same syntax as an item in a library file, except that Name and Description will be ignored. An example is:
---
PartData:
    Specs:
        Material: A2 (18-8) Stainless Steel
    Suppliers:
        McMasterCarr:
            PartNo: 91292A112
            Link: 'https://www.mcmaster.com/91292A112'
        RS Components:
            PartNo: 280-997
            Link: 'https://uk.rs-online.com/web/p/socket-screws/0280997/'
---

# M3 x 8 mm Cap Screw (Stainless Steel)

This is a longer page all about this rather simple metric screw. I could provide photos of the screw, technical drawings, or references to the ISO standards that define the thread.
GitBuilding BuildUp
While GitBuilding is currently the only project using BuildUp we want to make BuildUp into a standard. Long term we would like platforms like Wikifactory, Wevolver, and Instructables to support the standard. This way if your documentation is portable.
GitBuilding does a few things which can make documentation more useful, but we don’t think they belong directly in the BuildUp standard as other software or platforms will want to work differently. None of the what is detailed bellow changes the BuildUp standard, or adds any extra syntax, instead a certain way of writing BuildUp will cause GitBuilding to tidy up the documentation.
Image galleries
Sometimes a large group of sequential images looks messy. In GitBuilding if you start a new line and the include multiple images on that same line or subsequent lines (with no other text on the lines) it will turn the images into a gallery. For example:
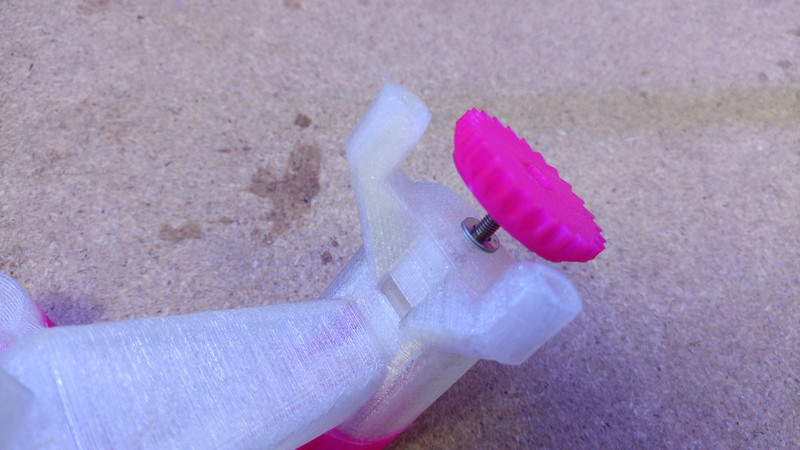
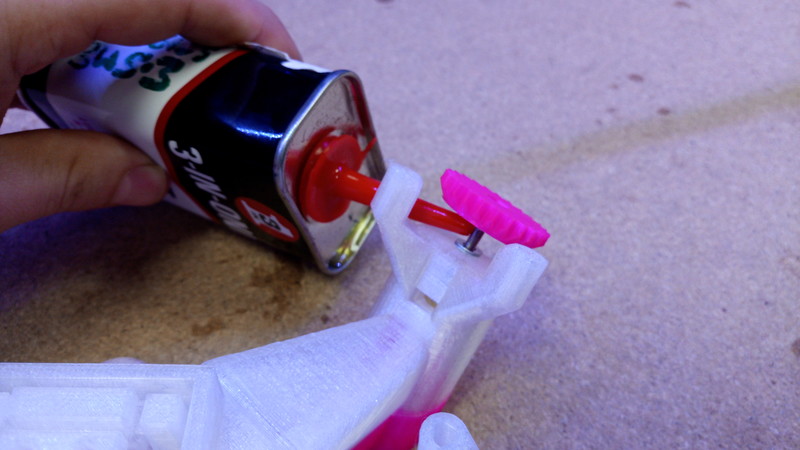
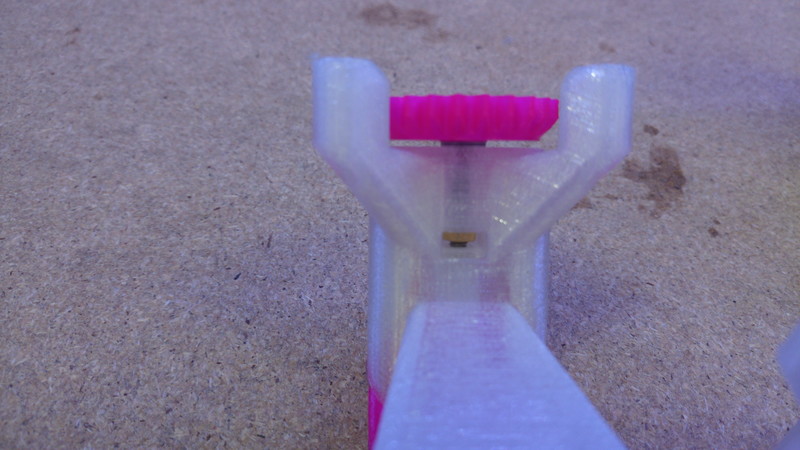
Start screwing the gear into the actuator column from the top. Apply a small amount of [light oil]{Qty: "A few drops of"} to the screw thread, before you fully tighten the screw


will render as:
Start screwing the gear into the actuator column from the top. Apply a small amount of light oil to the screw thread, before you fully tighten the screw
Equations
GitBuilding uses KaTeX and markdown-katex to render LaTeX equations:
We can render inline maths with: $`a_i`$ and full equations as:

```math
A = \sum_{i=0}^{N}a_i
```
which will render as:

Source code
GitBuilding uses Pygments to highlight source code within fenced code blocks:
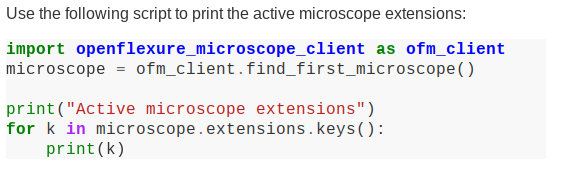
Use the following script to print the active microscope extensions:

```{.python}
import openflexure_microscope_client as ofm_client
microscope = ofm_client.find_first_microscope()

print("Active microscope extensions")
for k in microscope.extensions.keys():
    print(k)
```
which will render as: